
I’m going to use the ‘Money Pit’ scenario for this tutorial so the scenery in the screenshots will look familiar. I’ll be skimming over some features, but you’ll find more detail about them in later sections of this guide.
Start up the Money Pit scenario and for now let’s just use the usual ‘Advanced’ control mode.

The FCR Editor will work with the other viewing modes too. ‘Freelook’ can be very useful, if a little tricky to master, so I’ll cover it later on.
Bring up the Editor by pressing CTRL+SHIFT+0, then click the New Route drop shadow to reveal the rest of the controls. A default view will appear in the mini preview window, probably from a vantage point underground. Just ignore it.
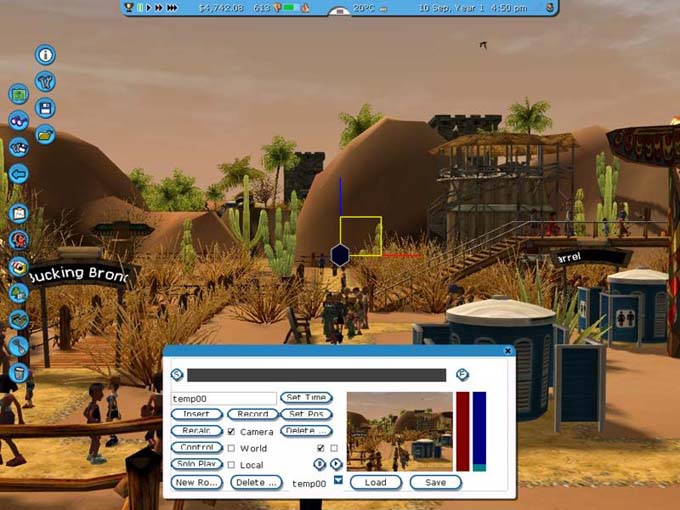
Move your view to the path near the washroom facilities, looking towards the low hills which divide the park in two. Click the ‘S’ button to start the camera route. You should see some markers appear on the screen like this:
Move your view forward and up so you are over top of the low hills. This will be your second camera position on the route. Click the ‘E’ button (it looks like ‘F’) to add this camera position to the end of the route. Camera position icons for both the start and end positions will also appear on the timeline.
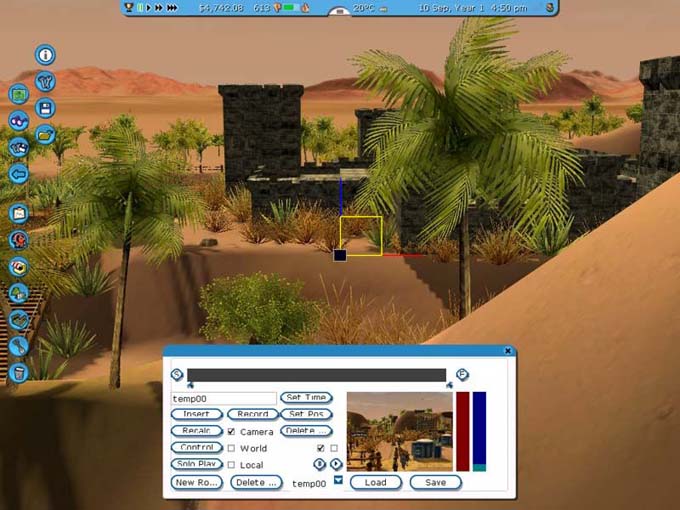
Let’s add one more camera position. Continue moving forward and down until you are near the castle on the other side of the low hills. Click the ‘E’ button in the Editor’s window again to add this camera position to the end of the route.

Before testing the route, let’s adjust the overall speed with the red vertical slider. Initially it will be set at its slowest speed. Click just a tiny bit above that to make it go much faster.

Click the Play button to see your route unfold in the mini preview window. Woot! Our first camera route! Let’s watch it again, but full screen. Check the Full Screen Preview box, then hit Play again. When it’s finished, don’t forget to uncheck the box so we’re back to the usual viewpoint. Want to preview the route without any interface windows or buttons? Click the Solo Play button. Always remember to uncheck that Full Screen Preview box when finished or you’ll be wondering why the heck you can’t move your viewpoint. Yup, I’ve done that many times.
To check what the camera will see at any given moment, click on the timeline at that spot. In fact, you can even click-and-drag with the left mouse button to ‘scrub’ back and forth through your camera route.
Let’s fine-tune the view at the second camera position. When making these sorts of adjustments, you’ll be working on the main screen so you can see the camera markers, but keeping an eye on the mini preview window to the results of your adjustments. Click on the on the timeline just above the second camera position icon.

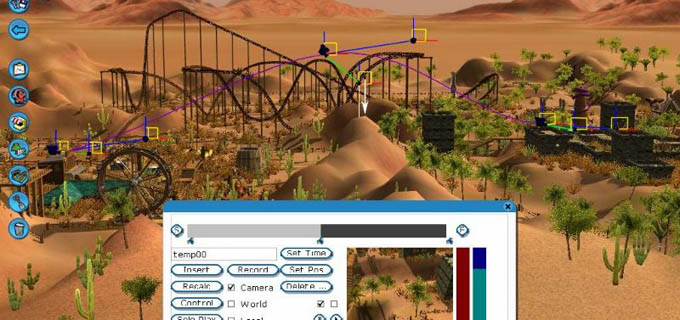
The mini preview window shows you what the camera sees at that moment. Now back up and adjust your view in the main screen so you are looking sideways at that second camera marker.

Adjust the size of the markers with the blue slider so you can see them clearly. There are two control markers attached to the camera. One controls the direction in which the camera is moving (blue line), the other controls where the camera is looking (green line). So yes, you can have the camera looking in a different direction than it is traveling. Lots of creative possibilities.
You’ll see some axis control widgets sticking out of each marker. There are three different styles for these widgets, for now we’ll just use the default ‘Camera’ mode. Details about the other modes can be found in a later section of this guide.
To move the camera up and down, move your cursor into the yellow square until it becomes highlighted, then click and drag it. I’m going to raise the camera a bit.

You’ll see the purple camera route move with it, and the mini preview window will change.
To change where the camera is looking, we’ll move the marker at the end of the green line. Grab the yellow square axis widget for the marker (make sure it’s highlighted) and drag it. I’m moving mine so the camera looks down towards the ground as it flies over the hill.
Now try playing the route again in the mini preview window to check out the changes you made.
If you’ve moved it backwards or forwards as well as up, you may find the camera seems to slow down or speed up a certain points. This is caused by the differing amount of distance between camera positions. You can try to fix this by grabbing the camera position icons below the timeline and sliding them back and forth.
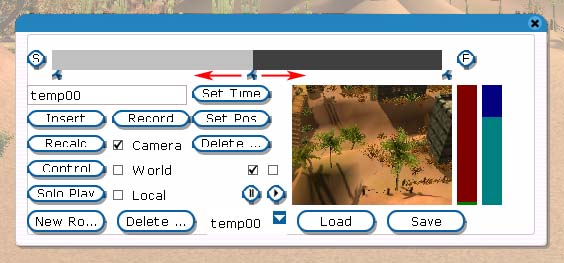
Or let the program fix it for you. Click the Recalculation button and it will adjust the timing in an attempt to keep a consistent camera speed. Of course, you may want to keep the varying speeds for specific dramatic effects.
Another automated aid is the Control button. It will adjust the control markers for the cameras to try and smooth out its movement. Sometimes it’s a big help, sometimes not.
OK, enough fiddling, let’s make a video clip already! Hang on just a moment, for safety’s sake let’s save our camera route first, just in case. Click the Save button, type in a filename for the route, and click the little disk button. These ‘.fcr’ files are saved in the main folder where RCT3 was installed.
Finally it’s time to hit that Record button. Just like video capturing from a CoasterCam, this is a slow frame-by-frame process but it gives very good quality results.
One annoying thing: when it reaches the end of the camera route, the FCR Editor’s window reappears, but it doesn’t stop recording! Use the CTRL+SHIFT+F11 key combo to stop it. Now you can go to your ‘My Documents\My Videos\RCT3\’ folder to find the resulting video clip. Double-click on it to play the clip in Windows Media Player or whatever viewer program you use on your computer.
That’s the basics of creating a straight-line flying camera route and using it to record a video clip. You can see that there are many interesting shots you can get just with this simple example. But suppose you want the camera to move in a curved path around a corner? That’s the subject of our next tutorial.
